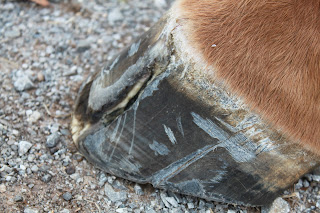
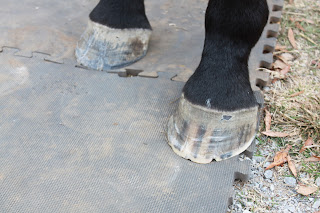
I used SBS Hoof Crack repair kit. I do all my own trimming and opened the crack in preparation for the adhesive. The adhesive was mixed and applied within minutes. We also repaired the cracks in Tucker's horse's hoof as well as the cracks in Phippen's hooves. After seeing the damage done by an unattended crack in Vicar's foot, we aren't taking any hoof cracks for granted.
I cleaned the hooves with water and bleach before I started cutting out the crack. As I cut away the involved hoof wall, my goal was to cut the least amount while still exposing the source of the crack to light and air because I believe the majority of the "black crud" is anaerobic bacteria, fungus and dirt that continue to work up into the crack until it is exposed and cleaned out. I repeatedly rinsed the crack with a 50/50 bleach water solution to assist in the cleaning.
On the back crack it was clear that I was not going to be able to remove all of the vein of black crud. Notice that the cut into the hoof wall is approaching the white line which is where I stop. It's just a pedicure until we get to this part of the hoof. Beyond that we're getting into what I consider surgery on the hoof and I will leave that up to the vets if my patch does not work.
The blue tape was an attempt to keep the crack filling material away from the hairline. I actually found it unnecessary in the end.
The directions suggest over-filling the crack. Once the bonding material hardens (after approximately 15 minutes) then I rasped away the extra material.
These images below were taken of Bentley's hooves (Tucker's horse) to illustrate the cracks before the trim, after the trim and as I prepared the crack for filling. Notice the way that Bentley's feet grow between trimming. The flares in his feet create the unequal weight bearing surface and the cracks. Flares when unmanaged eventually lead to cracks and any repair of a crack has to be followed up with "floating" or rasping the ground-touching surface so that the weight-bearing pressure does not continue to split the hoof.
As you can see our set up for the repair was minimalist. We used the mats to keep the hooves on a clean surface- I decided the wash rack was too difficult to get really clean. I also wanted the horse to stand on a clean surface so that the bonding material did not get any debris in it. I used the seran wrap on the cracks that were expanded at the bottom because the Seran wrap kept the material from sliding out as it hardened. The plastic wrap also kept the surface of the hoof clean and smooth requiring little rasping after hardening.
Calling this one, "Still Life with Hoof Crack Repair Kit"


No comments:
Post a Comment
Note: Only a member of this blog may post a comment.